<$BlogRSDUrl$>
Swetha's Fusion
Where there is Fusion there is Creation!

Cauliflower Tawa Fry - South Canara Style

Sunday, July 14, 2024


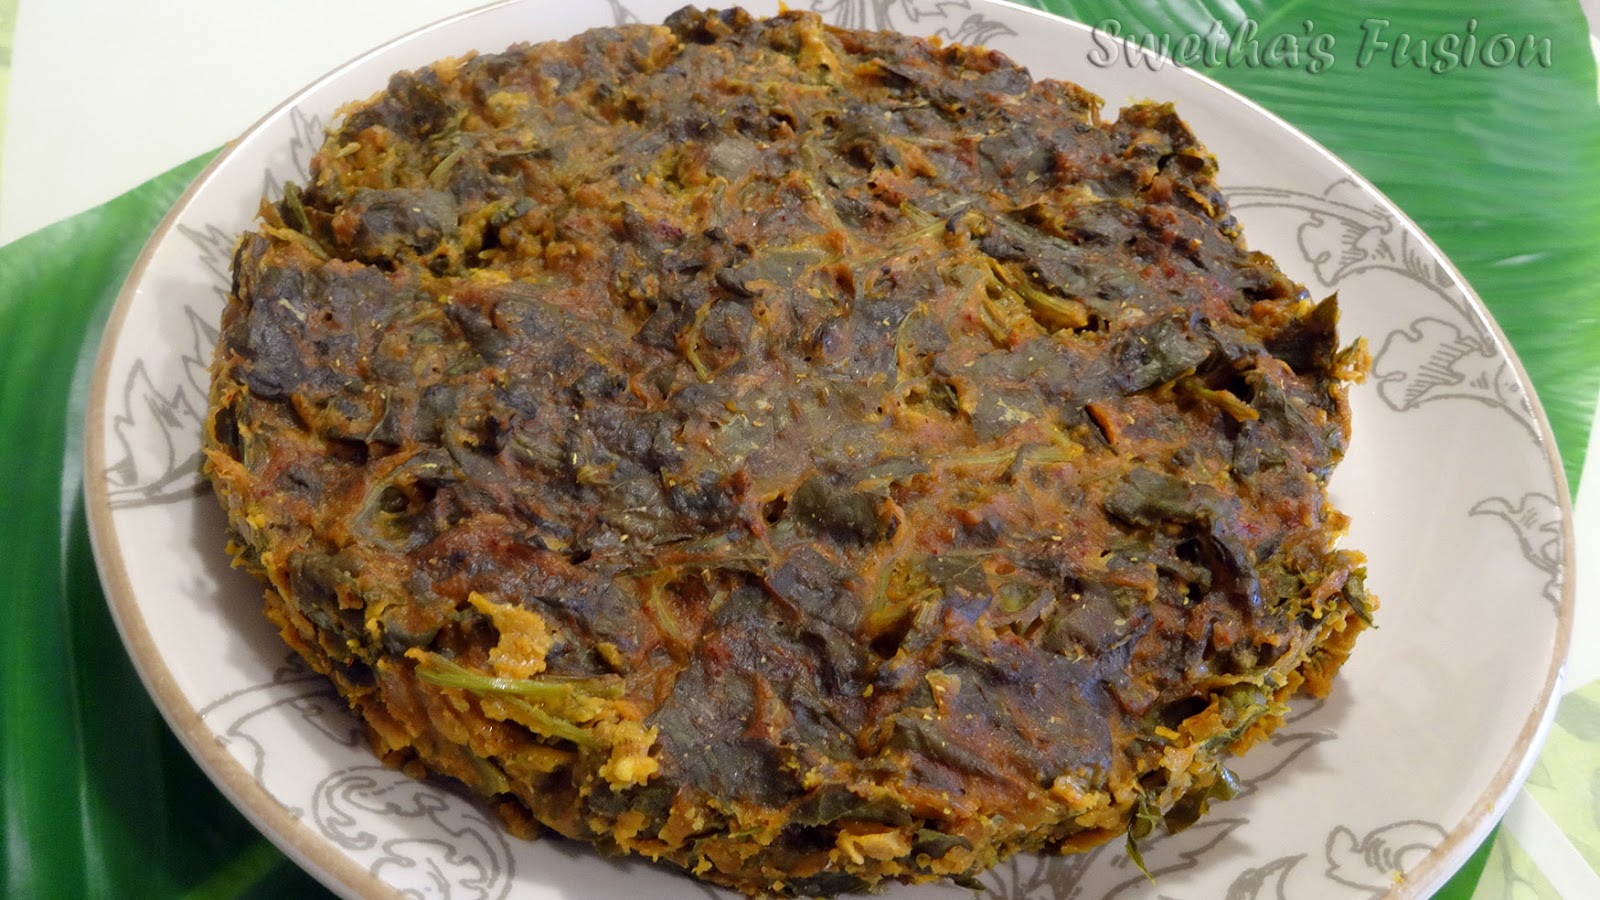
Cauliflower Tawa Fry and similar tawa fry dishes are made as a side dish to go with Ganji. In india, as any typical Mangalorean house, we ate 'kuchalakki ganji' for supper. Which is basically red boiled-rice porridge, -very nutritious and well suited for the tropical weather conditions.
Check out other tawa fried side dish recipes.

Ingredients 

Masala for Marination:

Method:

  1. Cut the cauliflower florets into slices. Basically cut lengthwise in the middle, about a centimeter thick.
  2. Take a bowl of warm water or tap water, mix some salt. Put the slices in the water till ready to use. Soaking in water helps in removing chemicals like pesticides and salt helps kill any bugs if present as well. 
  3. To prepare the masala, take all the masala ingredients listed in a mixing bowl, add little water and mix it to form thick paste.  
  4. Drain the sliced cauliflower from water put it into the mixing bowl with masala. Keep it aside and marinate for about 15 mins.
  5. After 15 minutes, sprinkle the suji rava over the mixture, mix it to lightly coat the cauliflower slices. 
  6. Place a flat fry pan on stove, switch it on to medium flame. Lightly spread oil over the pan. 
  7. Once the pan is hot, transfer the marinated cauliflower slices on the pan, spread and arrange them evenly. 
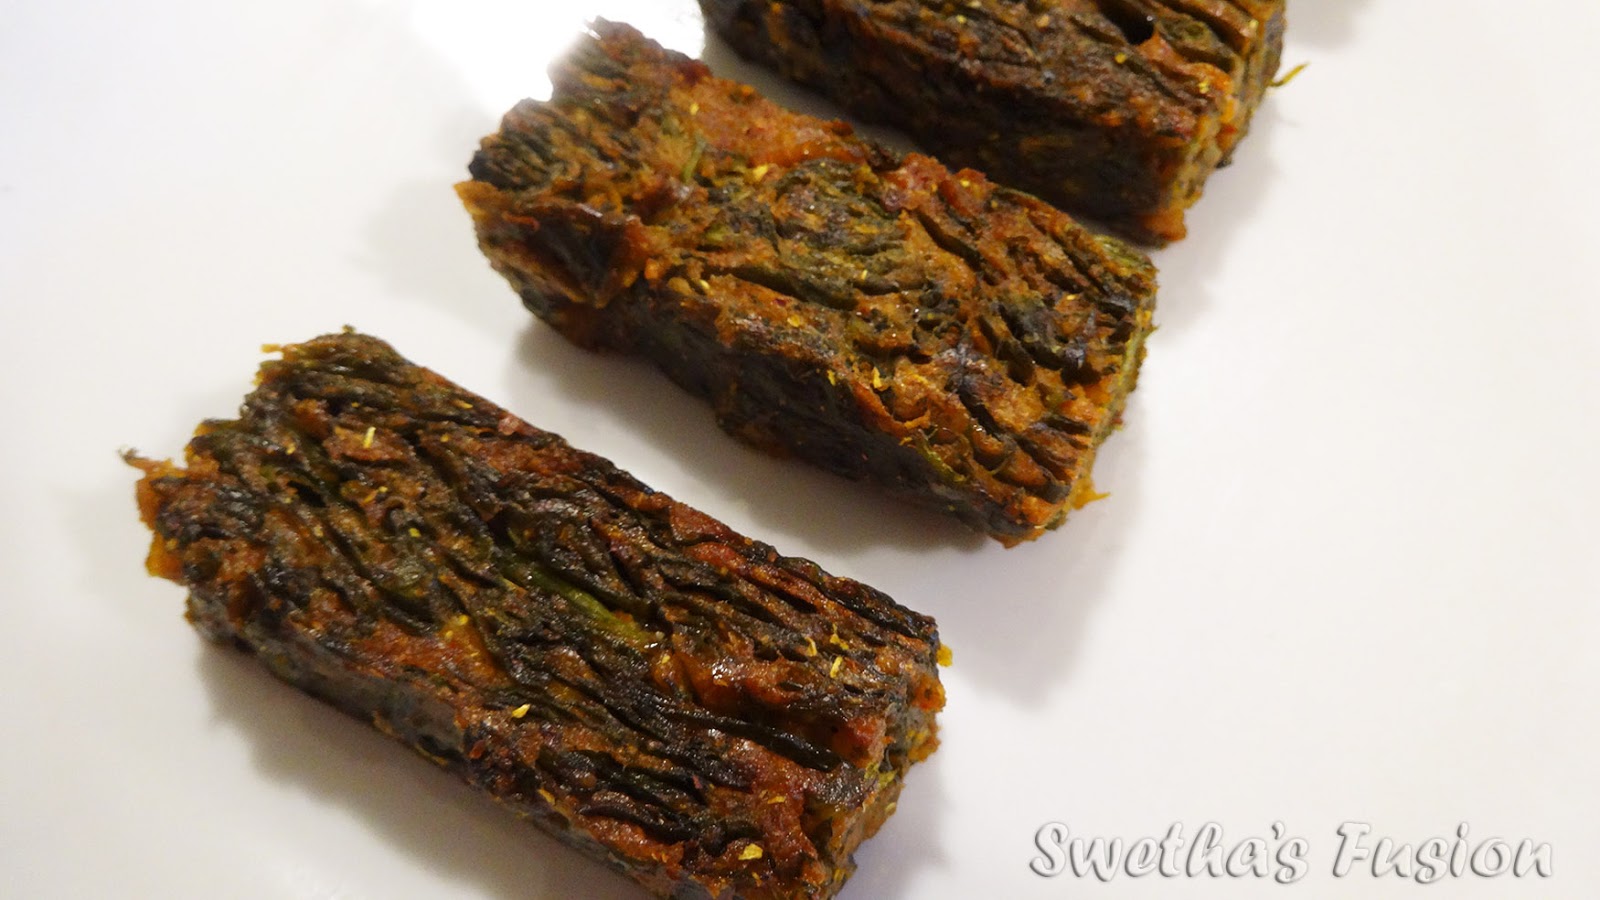
  8. Reduce the flame to medium-low, drizzle 1 tsp of oil over the  cauliflower slices, cover the pan and cook for about 4 to 5 minutes or until the underside of the slices are crispy.
  9. Remove the cover, flip each slice, on a low flame, let the other side get crispy as well. No need to cover the pan this time. Will take about 5 to 7 minutes.
  10. Serve hot along with rice. 
NOTE:
  • You may use same masala and steps to make tawa fry with Potato, Brinjal/Eggplant, Breadfruit, Plantain/green-banana, Kantola/spiny gourd and Fish. 
  • Lime juice can be substituted for tamarind paste.
  • I usually use Rasam powder as it gives more flavor. If you don't have rasam powder, just substitute with more red chilli powder.
  • Garam masala can be substituted for Rasam powder. One may notice, we in South India do not use much of Garam masala in our dishes as it does not suit the weather condition and one may end up upsetting their stomach. Garam means 'Heat', Garam masala is good to use in cold place like in North India, It generate heat in your body while digesting. If we do use garam masala, we also add poppy seeds, black pepper, coconut etc., to cool down and counter act. My mom would make Gasgase (poppy seeds) payasa for desert after having a meal which needed garam masala (like Chicken curry or Biryani)


Labels: , , , , ,

~ Cauliflower Tawa Fry - South Canara Style ~
Posted by Swetha @ 7/14/2024 08:18:00 PM :: 0 comments

Swetha's Fusion :: permalink


Mung beans curry | Hesaru Kalu Thove recipe - with interesting & unique seasoning/tadka technique with white-stone

Saturday, July 10, 2021
My mom made this Hesaru Kalu Thove (sprouted Mung beans curry) for breakfast to go with Kotte Kadubu (almost) on all festival days. We would wake-up in the morning smelling this yummy curry which would help us speed up with morning chores.  Kotte Kadubu is idli made with filling idli-dough inside cups made out of Jackfruit leaves and steam cooked.

Now, coming to that 'interesting seasoning' part in the post tittle. In coastal Karnataka (Kundapura) area, this curry and few other curry (like fish curry) is seasoned with placing a hot piece of rock (basically a stone) in seasoning-pan. My grandma used to burn the stone on hot embers in her wood burning stove, the stone would almost turn red-hot. [NOTE: This is NOT same as adding smokey flavor to your curry which is achieved by placing hot charcoal on a bowl kept in the center of the curry and pouring oil over the charcoal and covering the lid so as to induce the smokey flavor/smell to the curry  - which many Punjabi curry recipe calls for.]  But using this stone in seasoning gives an unique flavor, it instantly fills the whole house with aroma. Now, I know how we woke-up smelling the curry on festival days.

This is very unique technique only few families follow it, btw it is an optional step. I follow my mom's recipe placing stone on gas-stove fire to make it hot. My father helped me pick-up couple of these stones during our trip to Hampi. Near the river banks and one of them we found after hiking Anjanadri betta/hills (575 steps) ...probably part of some construction. Pappa informed me that it is called "Belgallu or Bella Kalu" - white stone. I don't know what it is called in English, but I am definitely sure it is not Marble.  The stone is slightly translucent and when heated, it gets a oily shine on the surface. After doing some online Google (re)search I narrowed it down to two types of rocks Gypsum or Quartz. Not sure which one it is (may be neither) as I am not a Geologist :P  Here is a picture of the stone I used.
This curry is usually made with only sprouted whole mung beans. But this time, I sprouted ½ cup mung beans and ½ cup black eyed peas as well. The curry requires bit of planning ...about two days ahead, unless you plan to use store brought ready sprouted beans. NOTE: using good coconut oil gets you that authentic taste and aroma of the curry. That said, other oil may be used. 

Ingredients:
  • 1 cup - whole mung beans 
  • 1" - ginger - sliced
  • 1 - large onion - cut into chunks
  • ¼ tsp - turmeric powder
  • 3 tbsp - coconut oil
  • 3 - garlic cloves
  • 1 tbsp - onion -finely cut -for seasoning
  • ¼ tsp -  asafoetida (optional)
  • salt as per taste
  • The stone - Optional for seasoning 
Ingredients for Masala:
  • ½ tsp - mustard seeds
  • ½ tsp - fenugreek seeds
  • 1 tsp - cumin seeds
  • 2 tsp - coriander seeds
  • 10 - red chilies - I use byadagi red chilies
  • 1 cup - grated fresh coconut
  • 1 - small onion - chopped
  • 6 - garlic cloves - chopped
  • 4 - cloves
  • 3 tbsp - tamarind pulp
  • ½ tsp - oil - I use coconut oil
Preparation:
  • Mung beans sprouts - 2 days ahead: wash and soak mung beans for over 10 hours. Drain the mung beans in a strainer, cover it with wet cotton cloth (like kitchen towel) and keep aside for over night. Do NOT put it in the refrigerator. Next day morning, again wet the towel and cover. If the beans look too dry, sprinkle some water. Have to do the same in the evening as well. Next day morning, you will see the bean sprouts. 
  • Masala: Heat ½ tsp of coconut oil in a wide pan on medium low flame, roast mustard seeds, cumin seeds, fenugreek seeds and coriander seeds. Reduce the flame to low. Add red chili, cloves and garlic cloves to the pan. Stir and roast for about 2 to 3 minutes. Turn off the flame and let it cool down. Transfer the roasted mixture to a blender/mixie jar. Add grated coconut, chopped onion,  and tamarind pulp to the jar. Add ¼ cup of water and grind it to smooth paste and keep aside.
Method
  1. Transfer the sprouted beans in to a pressure cooker, add ¼ tsp turmeric powder, ginger slices, 1 tsp salt and 3 cups of water. (I usually cook this curry in pressure cooker pan)
  2. Pressure cook for 3 whistles. Turn off the stove and let the pressure release on its own.
  3. Remove the pressure cooker lid and place pressure cooker pan with cooked beans back on the stove on medium flame or transfer the cooked beans to a sauce pan.
  4. Add cut onion. Stir and cook for couple of minutes.
  5. Now add the ground masala and salt. Add a cup of water and mix. 
  6. Once the curry comes to boil, cover and simmer for about 8 minutes or until it is cooked . Stir in between.
  7. Meanwhile, if using the stone for seasoning, place it on the stove to let get it hot. Flip the stone multiple times with help of metal kitchen tongs
  8. Once the curry is cooked, turn off the stove. 
  9. Seasoning: heat a  seasoning pan. now carefully place the hot stone in the seasoning pan. Pour coconut oil over the hot stone. Note and be careful, the oil will immediately starts to boil. These is when you get that sizzle and fill the house with that nice aroma. Add crushed garlic cloves and cut onion. With a long spoon stir them around the stone. Once you notice that the garlic are roasted add asafoetida powder to the oil and turn off the flame. 
  10. Carefully pour the seasoning over the prepared curry (along with the stone) and cover the lid immediately so that the aroma is infused into the curry. 
  11. Mung beans curry | Hesaru Kalu Thove is ready to serve. Serve hot with kotte kadubu, idli, dosa, roti, chapati or rice. 
  12. Enjoy this unique recipe with your family. Hope you like it.

Labels: , , , , , ,

~ Mung beans curry | Hesaru Kalu Thove recipe - with interesting & unique seasoning/tadka technique with white-stone ~
Posted by Swetha @ 7/10/2021 02:09:00 PM :: 0 comments

Swetha's Fusion :: permalink


Palak Pathrode | Spinach Patra

Sunday, July 12, 2020
This is a slight twist for the classic Pathrode recipe. Do love Pathrode made out of Colocasia leaves, but since Colocasia leaves are not available here, it is not going to stop me from enjoying Pathrode. This version is made with fresh palak/spinach leaves, besides it is slightly easier to make, ...and don't have to deal with Colocasia leave's irritating itchiness. Taste is almost the same. Hope you will enjoy this version of Pathrode Recipe with your friends and family.
Hint: Save some of the Pathrode Masala for making ridge gourd bajji/pakoda

Ingredients:
  • 4 cups - Spinach leaves
  • 1 cup - Rice 
  • 2 tbsp - Dhania | Coriander seeds
  • 1 tbsp - Jeera | Cumin seeds
  • 1 tsp - Methi | Fenugreek seeds
  • ½ tsp - Mustard seeds
  • 2 tsp - Urad dal | Black gram
  • 2 tsp - Channa dal | Split chickpeas
  • ½ cup - fresh grated coconut. (optional)
  • 10 - Red chilies or depending on how spicy you want use the amount chillies . I use Byadgi red chili which is on the milder side. May choose to combine Kashmiri and Byadgi chili to achieve desired spice.
  • 1 tbsp - Tamarind paste
  • 1 tsp - Jaggery 
  • 1 tsp - turmeric pdr
  • Salt - as per taste.
  • ½ cup  - Oil for shallow frying. I use coconut oil, which gives authentic flavor.
Preparing the Masala:
  1. Soak rice overnight or for at least three hours.
  2. In a pan, dry roast coriander seeds, cumin seeds, fenugreek seeds, mustard seeds. urad dal, channa dal and red chilies. Transfer it to a blender/food processes

  3. Optional step: In the same pan, dry roast grated coconut. Add it to the blender along with other roasted ingredients.
  4. To the blender, add tamarind paste, jaggery, turmeric pdr and salt. Add 2 tbsp of water and grind. If needed, add more water. Grind it into a smooth paste.

  5. Drain soaked rice,  Add it to the blender and grind it into slightly course paste. 
  6. Keep the ground paste aside. 
Preparing the Leaves:
  1. Wash spinach leaves. Cut thick stems. 
  2. Put the leaves in a colander or spread them on a kitchen towel to remove the water. Keep aside
Prepping and cooking the Pathrode:
  1. Take 1/4 portion or more of the masala and keep aside
  2. Pour rest of the masala into a large mixing bowl. 
  3. Check for consistence of the masala, if it is too thick add some water. If it is watery add some rice flour.

  4. Roughly chop the spinach leaves and add the leaves to the masala. 

  5. Mix all together. Cover and keep aside for about 10 minutes.

  6. Meanwhile add water to bottom of the steam-cooker/idli-cooker/pressure-cooker and put it on stove on medium flame. Bring the water to boil
  7. Apply oil to the bottom of a metal-pan or cooker-pan. keep aside 
  8. After 10 minutes, you will notice that the spinach has settled well with the masala. If needed, mix-in some more masala which was kept aside. 
  9. Now pour the spinach-masala mixture to the prepared cooker-pan. Thickness should be about 1 to 1½ inches. If needed separate the mixture into two pans.
  10. Spread and press the mixture evenly.

  11. Place the pan in the cooker (by now the water should have come to a boil)

  12. Cover and steam cook on medium flame for about 25 to 30 minutes until done
  13. If using pressure cooker, don't place the weight (just like cooking idli)
  14. Once cooked and flame is turned off, let it sit for about 5 to 10 minutes.
  15. Loosen the Pathrode from the pan using a knife or flat spatula. Transfer the cooked Pathrode onto a plate or a cutting board.

  16. Cut Pathrode into desired shape (square, rectangle or triangle)

  17. On a flat tawa, shallow roast on both sides applying little coconut oil. This step is optional but it gives that extra bit of crunchiness on the outer layer. 

  18. Serve hot as a snack or as a side dish. 

Enjoy one of the unique and exotic vegetarian dish from South Canara region of India.

Labels: , , , , , , ,

~ Palak Pathrode | Spinach Patra ~
Posted by Swetha @ 7/12/2020 02:09:00 PM :: 0 comments

Swetha's Fusion :: permalink


Pathrode | Pathravade | Patra | Colocasia Leaves Rolled Fritters

Thursday, June 25, 2020
Pathrode or Pathravade or Patra  is vegetarian dish from India. It is made from Colocasia leaves (chevu in Tulu, taro, kesuve or kachu or arbi) stuffed with rice flour and flavorings such as spices, tamarind, and jaggery(Wikipedia). Patram in Sanskrit and Patha in Hindi means leaf, Vade means fritters. Both combined makes the word Pathrode or Pathravade.


Patrode is my father's one of the favorite dish. So naturally, he makes sure we had good supply of Colocasia leaves in our terrace garden. He has 'Green thumb' and grows them in pots (picture below). The plant gives a nice green tropical touch to garden too. In fact, it is  everyone's favorite snack in our house. We all pitch-in to help prepare this dish and eat as well ;)  I should say, it does get messy during preparation, but  who cares, it is so delicious and has an unique taste, once you taste it you would want more. Usually made in the afternoon to have it for evening snack and side-dish for dinner. Here I am sharing my mother's Pathrode recipe.


 WARNING: The Colocasia plant contains an irritant which causes intense discomfort to the lips, mouth and throat. This acridity is caused in part by microscopic needle-like raphides of calcium oxalate monohydrate. It must be processed by cooking, soaking or fermenting – sometimes along with an acid like lime or tamarind before being eaten. (Wikipedia). Hence it is better to harvest tender leaves. My father knows when exactly to harvest the leaves. If left them for long the itchy irritant gets worse. Note: it is important to use ample tamarind in the recipe and also apply (coconut) oil on hands while handling the raw leaves. 

Also check out my version of  Palak/Spinach Pathrode recipe

Ingredients:
  • 20 - Colocasia leaves
  • 1 cup - Rice 
  • 1 cup - Whole Moong | Mung Beans | Hesaru Kaalu
  • 1 tbsp - Toor dal | Pigeon-peas
  • 2 tbsp - Dhania | Coriander seeds
  • 1 tbsp - Jeera | Cumin seeds
  • 1 tsp - Methi | Fenugreek seeds
  • ½ tsp - Mustard seeds
  • 2 tsp - Urad dal | Black gram
  • 2 tsp - Channa dal | Split chickpeas
  • ½ cup - fresh grated coconut.
  • 20 - Red chillies or depending on how spicy you want use the amount chillies . I use Byadgi red chilli which is on the milder side. May choose to combine Kashmiri and Byadgi chilli to achieve desired spice.
  • 3 tbsp - Tamarind paste
  • 1 tbsp - Jaggery 
  • 1 tsp - turmeric pdr
  • Salt - as per taste.
  • ½ cup  - Oil for shallow frying. I use coconut oil, which gives authentic flavor.

Preparing the Leaves:
  1. Cut off the stem. To trim off the thick veins off the Colocasia leaves, put the leaves on its back on a flat surface, use a knife in an angle and slide it to remove the thick veins. The thick veins has more irritants and will give more itchiness, besides it will be easy to fold with the hard veins gone.
  2. Soak the Colocasia leaves in water (with handful of salt) for about 10 to 15 minutes. 
  3. Remove the leaves from water. With a kitchen towel, dab and wipe the leaves dry.

Preparing the Masala:
  • Soak rice, whole mung beans and Toor dal overnight or for at least three hours.
  • In a pan, dry roast coriander seeds, cumin seeds, fenugreek seeds and mustard seeds. Transfer it to a blender.
  • In the same pan, now dry roast, urad dal, channa dal and red chillies. Add it to the blender.
  • In the same pan, dry roast grated coconut. Add it to the blender along with other roasted ingredients.
  • To the blender, add tamarind paste, jaggery, turmeric pdr and salt. Add 2 tbsp of water and grind. If needed, add more water. Grind it into a smooth paste.
  • Drain soaked rice, beans and dal. Add it to the blender and grind it into slightly course paste. 
  • Keep the ground paste aside. 
Prepping and cooking the Pathrode:

- This part gets messy, spread a clean newspaper or a big plastic sheet.
- Place one big leaf face-down on the sheet.
- Evenly apply the ground masala on the leaf.

 - Now place another leaf (face-down) over the first one and apply the masala. 
- Due to the masala on the first leaf, the next leaf will stick to it and stay put.

- Repeat the steps with couple of more leaves.
- Now folder over the two sides to give an even edge. 

-Apply masala over the folded area. 

- Now fold-in bottom 1/4 section and apply masala

- Do the same with the top 1/4 section.

- Now fold-over the half to form a nice evenly shaped rectangle.
- Note: you may want to shape your Pathrode so it fits in your steam-cooker.  If you have a small cooker use less leaves to form small bundled shape. It just needs lot of layers to give that flaky texture. 

Tie it with a (thick) cotton yarn/thread to help hold the shape.

- Repeat the steps with rest of the leaves to make more bundles.

- Now Pathrode is ready to be cooked.

-On a steam cooker stand or idli stand place the bundled Pathrode as shown in the picture

-Add water to the bottom section of the steam cooker (or pressure cooker)
- Bring the water to boil
- Place the stand and rest of the Pathrode bundles.
- Cover and steam cook on medium flame for about 25 to 30 minutes until done
- If using pressure cooker, don't place the weight (just like cooking idli)

- Once cooked and flame is turned off, let it sit for about 5 to 10 minutes.
- Cut off the thread and cut the Pathrode into 2 cms roles.
- On a flat tawa, shallow roast on both sides applying coconut oil. This step is optional but it gives that extra bit of crunchiness on the outer layer. 

Serve hot as a snack or as a side dish. 
Enjoy one of the unique and exotic vegetarian dish from Coastal South India.

Labels: , , , , , , ,

~ Pathrode | Pathravade | Patra | Colocasia Leaves Rolled Fritters ~
Posted by Swetha @ 6/25/2020 11:40:00 AM :: 0 comments

Swetha's Fusion :: permalink


Panpathli / Patholi / Ela Ada

Wednesday, June 10, 2020
This is my 100th Post. I made a century. Yeah!
This is a big milestone for me and my blog.
I choose this special traditional sweet Panpathli for my 100th post.
Hope you enjoy it!

My mom used to make Panpathli (or PathoLi) during festivals like Ganesh Chaturthi and Naga Panchami. Also sometimes for breakfast... yep! you read it right, for breakfast. This is a South Canara (Mangalore/Udupi/Kundapura) area and Konkani dish. The recipe is similar to Modak. Traditionally it is made on Turmeric leaves, which gives a distinct aroma and taste.  Since Turmeric leaves are not easily available, it can be made on Banana leaves or parchment paper. One more unique choice is to make Panpathli on Sugandhi (Ginger Lily) leaves which can be found in non-tropical region. The Ginger Lily plant/leaves resembles turmeric plant/leaves with similar aroma and the difference is that Ginger Lily has more of flowery fragrance to it. 

The pictures below shows Panpathli made on Banana leaves. The original recipe call for soaking rice and grinding into a thick paste in a stone grinder. Since not everyone has access to a stone grinder, the recipe has evolved into using rice flour.

Making Panpathli for festivals is a family event at our home as this recipe calls for multiple stages and steps. Everyone has a role to play. Leaves are harvested from the backyard, cut, cleaned and wiped dry, preparing the dough and filling, then when putting all together, children get to help too ..by applying the dough over the leaves or placing the filling. Hope you too have a good time as a family preparing and eating Panpathli.

Ingredients:
  • 2 cups - Rice flour
  • ½ tsp -  Salt
  • 2 cups - Water 
  • 1 tsp - Ghee
  • 2 cups - Fresh grated coconut
  • 1½ cup - Jaggery - pounded to make into small pieces
  • 1 tsp -  Cardamom powder (Optional: additionally may add little bit of cinnamon and/or nutmeg powder too)
  • 15 to 20: Turmeric or ginger-lily leaves, or Banana leaves 7" squares, or parchment paper  7"x7" or 7" dia (size may depend upon diameter of your steamer (or pressure cooker)
Preparing the dough: 
  1. Bring two cups of water to boil. I add 1 tsp of ghee and ½ salt to the water to enhance the flavor. Mix.
  2. Reduce the flame and mix-in rice flour. Keep stirring with a spatula. 
  3. Turn of the flame, cover and let it sit for about 5 to 10 minutes.
  4. Boil half a cup of water and keep it ready. 
  5. Transfer the dough on a wide plate/bowl so it is easy to knead. 
  6. Apply Ghee on your hand and knead to form soft dough. Mind it is hot.
  7. If it feels dry (crumbles) add bit of hot water and knead. If it is too watery, add bit more rice flour. May add bit more ghee.
  8. Cover with wet towel or paper towel and keep it aside.
Preparing the leaves:
  1. Wash leaves careful not to rip them. Cut the Turmeric leaves to about 6 to 8 inches in length or else it will be hard to place them in the steam cooker.
  2. Cut the stem-edge off if need, especially if it is thick.
  3. If using banana leaves, may immerse them in warm water for 10 to 15 mins to make it tender so it is easy to work with and fold over.
  4. Dab and wipe leaves dry. keep aside
Preparing the filling:
  1. Heat a pan or kadai. Add Jaggery to it. As the Jaggery melts and starts to boil, mix the grated coconut. Stir until it is evenly mixed. NOTE: no need to make jaggery 'Pakka' | one thread consistency.
  2. Cook until all the liquid is absorbed 
  3. Stir in the cardamom powder.
  4. Turn off the flame and keep it aside. 

Preparing Panpathli:
  1. Add water to the steamer (Atte/Idli Pathre) or idli maker. NOTE: May use pressure cooker WITHOUT placing the weight. (just like making idli). Traditional idli maker will have a metal plate to separate the steaming water from the food material. If you are using a pressure cooker, take only the bottom tier of idle stand with the rod in the center to place the Panpathli over it to be steam-cooked. 
  2. Take a big lemon-size amount of  rice flour dough and spread it evenly on the leaf.
  3. Spoon the filling on the center of the leaves -over the spread dough. 
  4. Gently fold the leaf  with the filling going lengthwise in the center. 
  5. Gently press the edges to seal the filling.
  6. Bring the water to boil in the steamer. 
  7. Place the Panpathli on the steamer plate and cook over medium flame for about 15 to 20 minutes... or until done.
  8. Serve warm with the leaves on or removed. I usually leave the leaves as it is easy to handle and also re-steam to warm-up the left over for evening snack or next day.  
Hope you will try this recipe and enjoy. 
Your comments and feedback are always welcome

Labels: , , , , , , , ,

~ Panpathli / Patholi / Ela Ada ~
Posted by Swetha @ 6/10/2020 02:55:00 PM :: 0 comments

Swetha's Fusion :: permalink