Breadfruit Fritters | JeevGujje Bajji | JeevKadgi Podi
Thursday, June 27, 2024

Breadfruit is an interesting fruit. When it is fully ripe, it is consumed as a
fruit which is sweet just like Plantain. For the sevory dish and curry, it is better to use the
breadfruit which is just before mature (See below). Don't use raw
breadfruit.
In India, breadfruit is mostly used in South-India, as it grows in tropical
climate. My mom made this podi as a side dish to have with supper. As any
typical Mangalorean house, we ate 'kuchalakki ganji' for supper. Which is basically
red boiled-rice porridge, -very nutritious and well suited for the
tropical weather conditions. The rice water in porridge, or ganji,
replenish all nutrients and water that are lost due to sweating and is rich in
amino acids, vitamin E etc,.
Ingredients:
- half of the whole Breadfruit
- 1 cup - gram flour | besan | chickpea flour
- 1 tbsp. - rice flour
- 2 tsp - red chilli powder
- 1 tsp - cumin seeds
- a pinch - of asafoetida (hing)
- a pinch - of baking soda [Optional]
- salt to taste
- oil for deep frying
Method:
- Cut half of the breadfruit one more time to make into 1/4th.
-
Peel the breadfruit's outer skin, cut it vertically to remove the
center core. Discard the skin and the core.
- Then cut it into slices. Crescent shaped .5mm to 1cm slices.
- Put the cut slices into cold water with bit of salt. Keep aside.
-
Meanwhile prepare the batter by placing the rest of dry ingredients in a
deep bowl.
- Gradually add water while mixing to make a smooth paste. Not too watery nor thick paste.
- Put oil for deep-frying on the stove on medium-high heat.
-
Once the oil is hot, reduce the flame to medium as breadfruit takes more
time to cook.
- Drain the breadfruit slices and keep aside.
-
Dip each breadfruit slice in the batter and carefully slide into the hot
oil for frying. Repeat with few more slices until fry pan fits enough.
Need to work faster here so that all the slices are evenly cooked. Do
not over crowd the pan, may have to make in multiple batches depending
on the size of your fry-pan.
-
Fry the podi in medium flame, flipping the podi after every few minutes to
cook evenly on both sides.
-
Once cooked, carefully remove the podi with a help of a large slotted
spoon - onto a paper towel to remove excess oil.
-
Serve hot as a appetizer with green chutney, or as a side dish with
rice.

Labels: Appetizers, Bonda/Pakoda, Fritters, Mangalore dish, Side-Dish, Snack, South-Indian Dish, Vegetarian
~ Breadfruit Fritters | JeevGujje Bajji | JeevKadgi Podi
~
Posted by Swetha @ 6/27/2024 01:24:00 PM ::
 Swetha's Fusion
 ::
permalink
Okra (aka Ladies Finger) Stir Fry | Bendekayi Palya | Bhindi Sabji
Wednesday, December 20, 2023
Bendekayi Palya is one more of the side dish had with rice and Rasam or Sambar or Huli(curry).
This is similar to other Mangalore style Palya with grated coconut but, with slight difference here and there.
For Bendekai, the main part is when prepping it, Since it has the tendency to get all slimy, there is one extra step before cutting them. So please read the instructions below.
Ingredients:
- 2 cups - Okra/Bendekai/Bhindi
- ½ tsp - Mustard Seeds
- 10 - Curry Leaves
- 1 tbsp - Rasam Powder (any brand will do)
- ¼ tsp - Turmeric Powder
- ¼ cup - Grated Coconut
- ¼ tsp - tamarind paste
- Pinch of asafoetida
- 2 tsp - Oil
- Salt to taste
Method:
- Wash Bendekai and drain the water completely. Use a kitchen towel and wipe each one of it separately. Now cut them into circles (kind of, as they look more like hexagon). Keep aside. NOTE: Watch out, there may be worms inside, so keep an eye while cutting. Once the cutting is done, rest is easy. But its worth the effort.
- Heat the oil in a pan, when hot, add mustard seeds.
- Once mustard seeds starts to splutters, add curry leaves and asafoetida.
- Add turmeric powder. Stir for 30 second.
- Now, add Bendekai and salt. Sauté for about 3 to 4 minutes.
- Next, sprinkle bit of water, reduce the flame, cover and cook for about 5 minutes or until the Bendekai is almost cooked.
- Now add grated Coconut and Rasam powder. Mix, cover and cook for couple of minutes.
- Now dilute tamarind paste with a tablespoon of water and mix with the palya. Let it cook stirring in-between until all the water is dried. Turn off the stove.
- Serve hot with Rice.
Labels: Mangalore dish, Sabzi/Stir Fry/Palya, Side-Dish, South-Indian Dish, Vegetarian
~ Okra (aka Ladies Finger) Stir Fry | Bendekayi Palya | Bhindi Sabji
~
Posted by Swetha @ 12/20/2023 06:26:00 PM ::
Swetha's Fusion ::
permalink
Ivy Gourd & Cashew nuts Stir fry | Thondekai Godambi Palya | Tindora Kaju Subji
Tondekai Palya used be a very common dish on the lunch menu in our house. Usually had with rice and curry. During festivals and weddings Cashew Nuts are added. Here in US, since it is not commonly available and if I do find them in Indian store I make the Palya with Cashew nuts. make it special since it is rare. I like this dish with Chapati as well.
Ingredients:
- 2 cups - Ivy gourd/Thondekai/Tindora (cut lengthwise)
- ¼ cup - Cashew nuts halves
- ½ tsp - Mustard Seeds
- 10 - Curry Leaves
- 3 - Green Chilies
- ½ tbsp - Rasam Powder or Curry Powder
- ¼ tsp - Turmeric Powder
- ¼ cup - Grated Coconut
- 2 tsp - Oil
- Salt to taste
Method:
- Wash and cut Ivy Gourd lengthwise. Keep aside.
- Finely chop green chilies. Keep aside.
- Soak the cashew nuts in warm water for 10 min. Drain and keep aside.
- Heat the oil in a pan, when hot, add mustard seeds.
- Once mustard seeds starts to splutters, add curry leaves and green chilies. Stir and cook until green chilies looks roasted.
- Add Rasam or curry powder and turmeric powder. Stir for 30 second.
- Now, add Ivy gourd and cashew nuts. Mix-in pinch of sugar and sauté for a minute or so.
- Next, add ¾ cup of water, salt as per taste, reduce the flame, cover and cook for about 15 minutes or until the Ivy gourd is almost cooked.
- Add grated Coconut to the palya. Mix and let it cook stirring in-between until all the water is dried. Turn off the stove.
- Serve hot with rice or as side dish for chapati/roti and enjoy.
Labels: Curry, Mangalore dish, Sabzi/Stir Fry/Palya, Side-Dish, South-Indian Dish, Vegetarian
~ Ivy Gourd & Cashew nuts Stir fry | Thondekai Godambi Palya | Tindora Kaju Subji
~
Posted by Swetha @ 12/20/2023 05:45:00 PM ::
Swetha's Fusion ::
permalink
Egg Roast | Motte Fry | Anda Masala Fry
Monday, December 26, 2022

Egg Roast or Motte Fry is one of the simple side dish, easy to make, but tastes grand.
What you need is boil egg, onion and any masala. I usually use ready Rasam powder from MTR. Sometime I just add Red chilli powder, coriander powder, and cumin powder. Optionally: garam masala powder and/or ginger-garlic paste may also be used. Just eyeball to your taste preference and prepare this yummy dish.
Ingredients:- 6 - Eggs
- 1 - Big onion
- ½ tsp - Turmeric powder
- 1 tsp - fennel seeds
- 1 tbsp. - ready Rasam powder
- 1 tsp each - cumin powder, coriander powder, and/or ginger-garlic paste [optional]
- ½ tsp - garam masala & ¼ tsp sugar [optional]
- 3 tbsp. oil / ghee
Method:- Preparation: Boil egg, remove the eggshell, and score lightly with a knife. Cut onion lengthwise - keep aside.
- In a pan, add oil and ghee on medium heat. Cook sliced onion with a pinch of salt and sugar until lightly caramelized. Set aside the onion,
- In the same pan, add a bit more oil/ghee. Lightly roast the rasam powder, fennel, and other spices before adding in the eggs. Keep stirring the eggs (or they'll pop!) and fry them until lightly roasted. Add in the onions and continue frying everything until browned to your liking. Serve with a sprig of coriander, enjoy!
Labels: Egg, Mangalore dish, Side-Dish, South-Indian Dish
Mung beans curry | Hesaru Kalu Thove recipe - with interesting & unique seasoning/tadka technique with white-stone
Saturday, July 10, 2021
My mom made this Hesaru Kalu Thove (sprouted Mung beans curry) for breakfast to go with Kotte Kadubu (almost) on all festival days. We would wake-up in the morning smelling this yummy curry which would help us speed up with morning chores. Kotte Kadubu is idli made with filling idli-dough inside cups made out of Jackfruit leaves and steam cooked.
Now, coming to that 'interesting seasoning' part in the post tittle. In coastal Karnataka (Kundapura) area, this curry and few other curry (like fish curry) is seasoned with placing a hot piece of rock (basically a stone) in seasoning-pan. My grandma used to burn the stone on hot embers in her wood burning stove, the stone would almost turn red-hot. [NOTE: This is NOT same as adding smokey flavor to your curry which is achieved by placing hot charcoal on a bowl kept in the center of the curry and pouring oil over the charcoal and covering the lid so as to induce the smokey flavor/smell to the curry - which many Punjabi curry recipe calls for.] But using this stone in seasoning gives an unique flavor, it instantly fills the whole house with aroma. Now, I know how we woke-up smelling the curry on festival days.
This is very unique technique only few families follow it, btw it is an optional step. I follow my mom's recipe placing stone on gas-stove fire to make it hot. My father helped me pick-up couple of these stones during our trip to Hampi. Near the river banks and one of them we found after hiking Anjanadri betta/hills (575 steps) ...probably part of some construction. Pappa informed me that it is called "Belgallu or Bella Kalu" - white stone. I don't know what it is called in English, but I am definitely sure it is not Marble. The stone is slightly translucent and when heated, it gets a oily shine on the surface. After doing some online Google (re)search I narrowed it down to two types of rocks Gypsum or Quartz. Not sure which one it is (may be neither) as I am not a Geologist :P Here is a picture of the stone I used.

This curry is usually made with only sprouted whole mung beans. But this time, I sprouted ½ cup mung beans and ½ cup black eyed peas as well. The curry requires bit of planning ...about two days ahead, unless you plan to use store brought ready sprouted beans. NOTE: using good coconut oil gets you that authentic taste and aroma of the curry. That said, other oil may be used.
Ingredients:
- 1 cup - whole mung beans
- 1" - ginger - sliced
- 1 - large onion - cut into chunks
- ¼ tsp - turmeric powder
- 3 tbsp - coconut oil
- 3 - garlic cloves
- 1 tbsp - onion -finely cut -for seasoning
- ¼ tsp - asafoetida (optional)
- salt as per taste
- The stone - Optional for seasoning
Ingredients for Masala:
- ½ tsp - mustard seeds
- ½ tsp - fenugreek seeds
- 1 tsp - cumin seeds
- 2 tsp - coriander seeds
- 10 - red chilies - I use byadagi red chilies
- 1 cup - grated fresh coconut
- 1 - small onion - chopped
- 6 - garlic cloves - chopped
- 4 - cloves
- 3 tbsp - tamarind pulp
- ½ tsp - oil - I use coconut oil
Preparation:
- Mung beans sprouts - 2 days ahead: wash and soak mung beans for over 10 hours. Drain the mung beans in a strainer, cover it with wet cotton cloth (like kitchen towel) and keep aside for over night. Do NOT put it in the refrigerator. Next day morning, again wet the towel and cover. If the beans look too dry, sprinkle some water. Have to do the same in the evening as well. Next day morning, you will see the bean sprouts.
- Masala: Heat ½ tsp of coconut oil in a wide pan on medium low flame, roast mustard seeds, cumin seeds, fenugreek seeds and coriander seeds. Reduce the flame to low. Add red chili, cloves and garlic cloves to the pan. Stir and roast for about 2 to 3 minutes. Turn off the flame and let it cool down. Transfer the roasted mixture to a blender/mixie jar. Add grated coconut, chopped onion, and tamarind pulp to the jar. Add ¼ cup of water and grind it to smooth paste and keep aside.
Method:
- Transfer the sprouted beans in to a pressure cooker, add ¼ tsp turmeric powder, ginger slices, 1 tsp salt and 3 cups of water. (I usually cook this curry in pressure cooker pan)
- Pressure cook for 3 whistles. Turn off the stove and let the pressure release on its own.
- Remove the pressure cooker lid and place pressure cooker pan with cooked beans back on the stove on medium flame or transfer the cooked beans to a sauce pan.
- Add cut onion. Stir and cook for couple of minutes.
- Now add the ground masala and salt. Add a cup of water and mix.
- Once the curry comes to boil, cover and simmer for about 8 minutes or until it is cooked . Stir in between.
- Meanwhile, if using the stone for seasoning, place it on the stove to let get it hot. Flip the stone multiple times with help of metal kitchen tongs
- Once the curry is cooked, turn off the stove.
- Seasoning: heat a seasoning pan. now carefully place the hot stone in the seasoning pan. Pour coconut oil over the hot stone. Note and be careful, the oil will immediately starts to boil. These is when you get that sizzle and fill the house with that nice aroma. Add crushed garlic cloves and cut onion. With a long spoon stir them around the stone. Once you notice that the garlic are roasted add asafoetida powder to the oil and turn off the flame.
- Carefully pour the seasoning over the prepared curry (along with the stone) and cover the lid immediately so that the aroma is infused into the curry.
- Mung beans curry | Hesaru Kalu Thove is ready to serve. Serve hot with kotte kadubu, idli, dosa, roti, chapati or rice.
- Enjoy this unique recipe with your family. Hope you like it.

Labels: Curry, Kundapura, Lentil, Mangalore dish, Side-Dish, South-Indian Dish, Vegetarian
~ Mung beans curry | Hesaru Kalu Thove recipe - with interesting & unique seasoning/tadka technique with white-stone
~
Posted by Swetha @ 7/10/2021 02:09:00 PM ::
Swetha's Fusion ::
permalink
Halasina Hannina Mulka - Jackfruit Fritters | Muffins - (Baked & Air Fried)
Wednesday, July 07, 2021
Halasina Hannina Mulka - Jackfruit Fritters is a traditional dish, originally recipe calls for deep frying. But for over six months I have not deep fried anything and I plan to keep it that way. Over the weekend I found Jackfruit and wanted to make mulka, so I experimented around and tried preparing it in my Air Fryer, came out yummy the first try. My Air fryer has the option for baking as well. So I first backed for 15 minutes, and then Air fried for 7 minutes. It was ready to eat after baking but, I wanted that roasted (bit burnt) outer layer which you get when deep fried. Yummy!
To be honest, in my opinion it turned out better than deep frying. I should confess, since I was not going to deep fry, I added some ghee to the dough and also brushed mulka with some ghee. Reminded me of the
Southadka Ganapathi temple prasada - sweet appam. Of course, no where near the authentic temple prasada, but house was smelling like one. I love that place ...so peaceful and serene open temple, how I wish to visit the temple now. I pray Lord Ganesha will bless me many more opportunity to visit again and again, ...and also visit his parents at
Sri Kshetra Dharmasthala to offer my humble prayers.
There are many variations for the recipe, some also make with rice flour and/or sujji rava (semolina). I make with wheat flour and sujji rava. Also see
Bale Hannina Mulka | Banana FrittersIngredients:
- 10 to 12 - fully ripe Jackfruit pods/arils (scroll to the end of this post for extracting the pods)
- 1 cup - whole wheat flour (some people use rice flour)
- ½ cup - Sujji rava | semolina
- ½ cup - grated coconut (may be grounded as well)
- ½ cup - jaggery -crushed to powder
- 1 tsp - cardamom powder
- 1 tsp - honey
- 1 tsp - poppy seeds
- ½ tsp - black pepper powder
- ¼ tsp - baking soda or Eno fruit salt
- ¼ tsp - baking powder
- ¼ tsp - nutmeg powder
- ¼ tsp - cinnamon powder
- 2 tbsp - Ghee (clarified butter) or oil
- pinch of salt
Method (the way I prepared it):
- In a blender or food processing mince the Jackfruit pods/aril to course pulp.
- Transfer the minced Jackfruit into a mixing bowl.
- Add coconut and jaggery. Mix it all together in hand, squeezing and breaking big pieces of jaggery. The mixture will turn watery.
- To the mixture, now add wheat flour, sujji rava, baking soda, baking powder and pinch of salt. The consistency should be of thick cake batter. If it is too runny, add more wheat flour. If it is too hard, add bit of milk or water and mix.
- Next stir-in nutmeg powder, cinnamon powder, black pepper powder, poppy seeds, cardamom powder and honey.
- Cover and keep aside for about 10 minutes ...for everything to blend in and for the baking soda and powder to do its job.
- Meanwhile, brush the muffin molds with ghee or butter or oil. Preheat the oven for 5 minutes on 375F.
- After 10 minutes, mix in 1½ of ghee to batter. Spoon the batter into the prepared muffin molds. [ I used silicon mini muffin/brownie molds - size worked out perfectly ]
- Place the muffin mold in the preheated oven and bake for 15 minutes on 375F. Turn the own off and let it stay in oven for 5 more minutes.
- At this point, the mulka is cooked and ready to eat. But I want the crisp (almost burnt) outer layer. So I air-fried the mulka. If you don't have air-fryer, just flip the mulka and broil for few minutes in the oven.
- Remove the mulka from the muffin mold, place them in air-fryer basket.
- Brush the mulka with rest of the ghee.
- Air-fry on 395 F [200 C] for 5 to 7 minutes.
- Mulkas are ready (for the second time). Share and enjoy yummy mulka with your family.

Method for extracting the Jackfruit arils and separating the seeds from the flesh:
- Apply oil on your hand, cutting board and knife. Also a good idea to spread a newspaper for easy cleanup. As when fruit is pruned, the inner part (core) secretes a sticky, milky liquid, which can hardly be removed from the skin, even with soap and water. Applying oil ahead helps the clean-up.
- Separate each firm yellowish aril (seed coat, flesh), which has an intense sweet taste.
- Slit open each aril and reach in to pull out the seed and its coat - thin, waxy, parchment-like and easily removable testa (husk) and a brownish, membranous tegmen.
Labels: Air Fryer, Baking, Banana, breakfast, Festive Food, Fritters, Mangalore dish, Sweet, Traditional Sweet, Vegetarian
~ Halasina Hannina Mulka - Jackfruit Fritters | Muffins - (Baked & Air Fried)
~
Posted by Swetha @ 7/07/2021 03:03:00 PM ::
Swetha's Fusion ::
permalink
Jackfruit Seeds - Spicy Savory Snack | Kara Halasina Hannina Beeja
Monday, July 05, 2021
Jackfruit itself is a unique fruit, biggest among the fruits. And its seeds are almost the size of a small lime. There are many recipes using Jackfruit seeds - curries, snacks etc. Seeds may be added to other curries. It has nutty flavor, almost like macadamia nuts. They are packed with many important nutrients, so don't throw them away. Enjoy this roasted savory snack.
A very important step for using Jackfruit seeds is to remove its outer hard skin - it is not edible. There are two ways, (1) after separating the seeds, wash and keep it aside for few days to dry out. You may crush the seed by hitting with pestle and then separating the outer white skin. (2) by boiling the seed in water for about 30 minutes and then put the seeds into cold water(blanch). Then remove the skin.
Ingredients:
- 1 cup - Jackfruit seeds
- ¾ tsp - turmeric powder
- ½ tsp - red chili powder or as per taste
- 1 tsp - salt
- 5 - curry leaves
- 2 tsp - oil
Method:
- To remove the Jackfruit seeds skin, transfer the seeds in to a pressure cooker, add 2 cups of water, 1 tsp spoon salt and ¼ tsp of turmeric powder. Cover the lid and pressure cook for 8 to 10 minutes or two whistles. Turn off the flame, release the pressure and drain the water. Now, drop the boiled seeds into a bowl of cold water. Remove the skin from the seeds. Discard the skin. NOTE: If you don't have a pressure cooker, boil the seeds in a bowl of water for about 30 minutes.
- Some of the seeds will be bigger than others, slice the big seeds into half.
- In a fry pan, heat 2 tsp of oil on medium flame.
- Once the oil is hot add curry leaves, rest of the turmeric powder and red chili powder. Stir a bit
- Now add the Jackfruit seeds and bit of salt. Please do a taste test before adding salt. Since the seeds were already boiled with salt, you may need very little salt or no need to add any salt at all.
- Stir and roast for about 3 to 5 minutes. Savory Jackfruit seeds are ready to snack.
- Serve them hot or at room temperature.

You may also check out other Jackfruit related recipes....
- - - ~ o 0 o ~ - - -
Labels: Appetizers, Healthy dish, Mangalore dish, Snack, South-Indian Dish, Vegetarian
~ Jackfruit Seeds - Spicy Savory Snack | Kara Halasina Hannina Beeja
~
Posted by Swetha @ 7/05/2021 10:42:00 AM ::
Swetha's Fusion ::
permalink
Kashi Halwa | Ash Gourd(Winter Melon) Halwa | Dumroot Halwa
Sunday, July 12, 2020
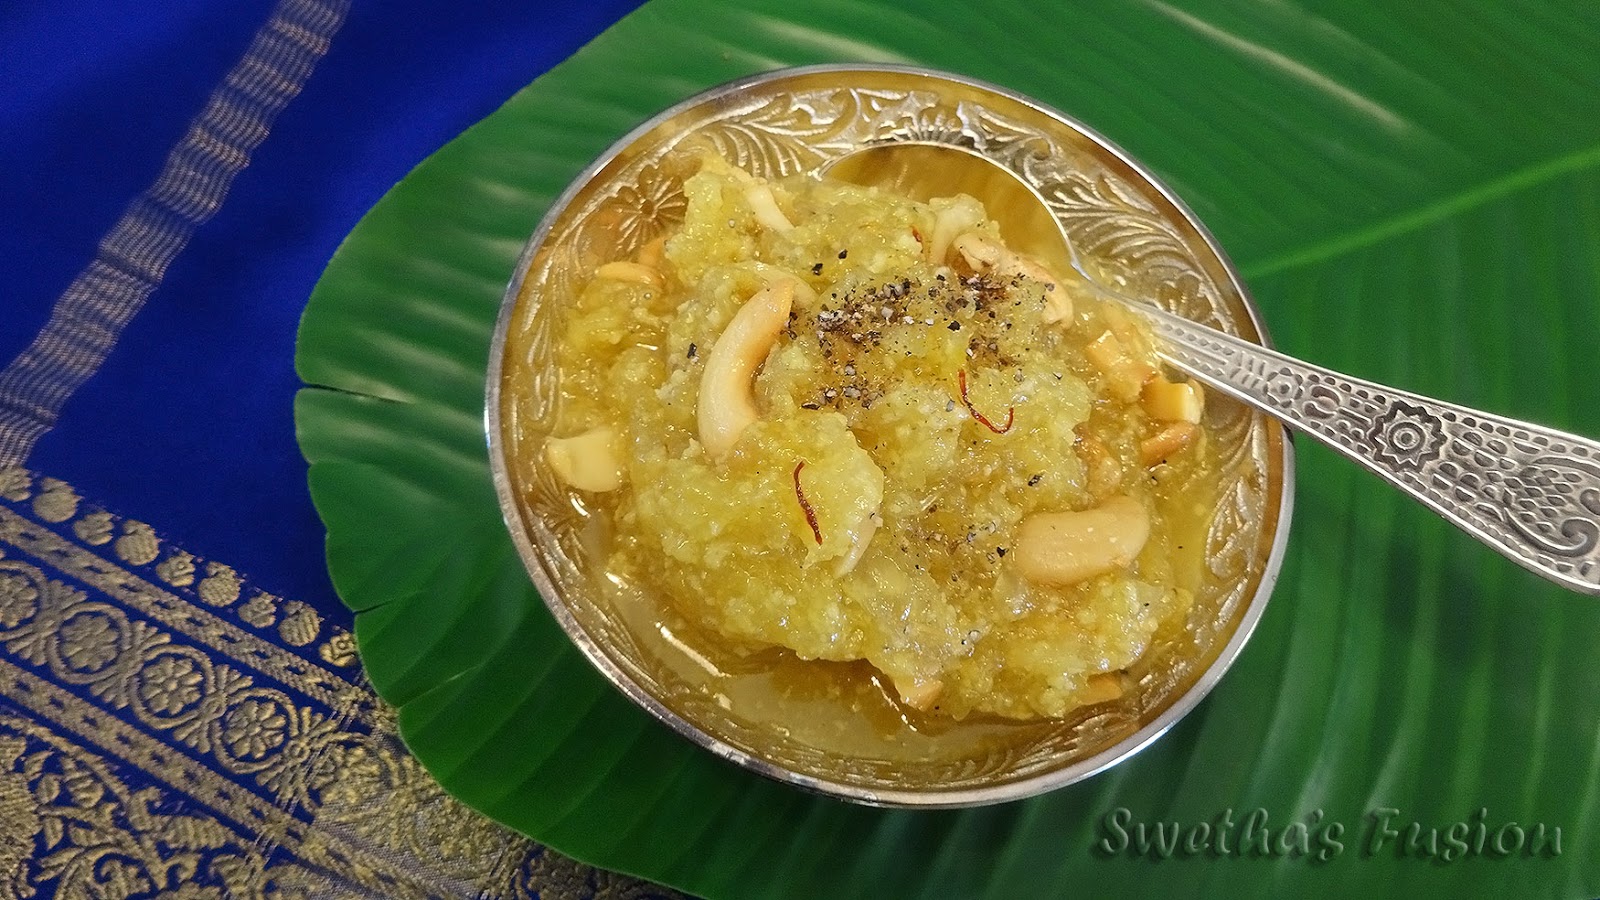
Kashi Halwa or Dumroot Halwa originates from south-canara (Udupi- Mangalore ) region. Made during festivals, served as dessert after meals. And at functions, sometimes it is served with a dollop of vanilla ice-cream. Yummy! Not only this combo is tasty, it adds volume to the dessert ...as Ash-gourd is mainly water, you will notice the reduced small volume of halwa after preparing it. Usually the serving size for (most of ) halwa is just one tablespoon per person.
Kashi halwa is made from Ash gourd/ Winter Melon. During one of the ISHA foundation workshop I attended, I learned that Ash Gourd as Positive-Pranic (energy) and is very healthy for ones physical and mental growth.
Kashi halwa has a sticky-candy texture. It is almost translucent and off-white in color. When saffron is added, it gets a yellowish hue to it. Also I cook grated Ash-gourd with milk or condensed milk (optional), which adds a bit of creamy texture to it.
Note: sugar should be added after Ash-gourd is completely cooked and has no raw taste to it. It needs very few ingredients, and is time consuming. But is worth every bit of effort and time. It helps to cook in a non-stick pan as you need not have to stand and stir the ash-gourd while it cooks (about 15-20 minutes), you can just cover the lid and stir occasionally. Enjoy this delicious Kashi halwa with your friends and family.
Halwa recipes: Carrot halwa, Falooda and China grass halwa, Duddi Halwa, Suji Pineapple halwa and Kashi Halwa.
Ingredients:
- 3 cups - Ash gourd/White Pumpkin/ Winter Melon/ BoodhKumbalakayi
- 1 cup - Sugar
- ½ tsp - Cardamom/Elaichi Powder
- ¼ tsp - Saffron strands
- 2 tsp - warm milk
- 10 - Cashew nuts halved/broken
- 3 tbsp Ghee
- ½ cup - milk |or| 2 tbsp - condensed-milk (optional)
Method:
- Peel the skin and de-seed the Ash-gourd. Wash and grate the Ash-gourd. Many version of the recipe call for draining the liquid of the grated Ash-gourd by squeezing or putting in a colander. But I save the liquid and let the Ash-gourd cook in its own water. Way throw away all the nutrients.
- Heat a non-stick pan (or kadai or wok) on medium heat add 1 tsp of ghee.
- Add the cashew-nuts to the hot ghee and roast to golden color. Remove the cashews and keep aside.
- In the same pan, now add the grated Ash-gourd, cover and let it cook. Stir the mixture in between, this whole process may take from 10 to 20 minutes depending on the quantity and tenderness of the Ash-gourd.
- Optional-step: after about 5 minutes, add milk or condensed-milk, mix, cover the lid and let it cook further until most of the liquid is absorbed or Ash-gourd is completely cooked and is soft.
- Meanwhile, to 2 tsp of warm-milk add saffron strands. Let it soak for about 2 minutes. Using a pestle or back of a spoon crush the saffron to extract more color. No need to make a paste or break the strand. Keep aside.
- Once the ash gourd is cooked stir in the sugar. Mix and cook. Keep stirring. From this point on, you can not leave the pan.
- Once sugar melts, mix-in the saffron and milk mixture. The color of the halwa will now turn to yellowish hue.
- Once the mixture thickens, add rest of the ghee, roasted cashew-nuts and cardamom powder.
- Continue stirring until the halwa starts to leave the sides of the pan and most of the liquid is absorbed. Turn off the heat.
- Transfer the halwa to a serving bowl. Let it cool and serve as is or with vanilla ice-cream

Halwa recipes: Carrot halwa, Falooda and China grass halwa, Duddi Halwa, Suji Pineapple halwa, Kashi Halwa and Badam Halwa
Labels: condensed milk, Desserts, Festive Food, Halwa, Mangalore dish, South-Indian Dish, Sweet, Traditional Sweet, Vegetarian
~ Kashi Halwa | Ash Gourd(Winter Melon) Halwa | Dumroot Halwa
~
Posted by Swetha @ 7/12/2020 04:19:00 PM ::
Swetha's Fusion ::
permalink
Palak Pathrode | Spinach Patra
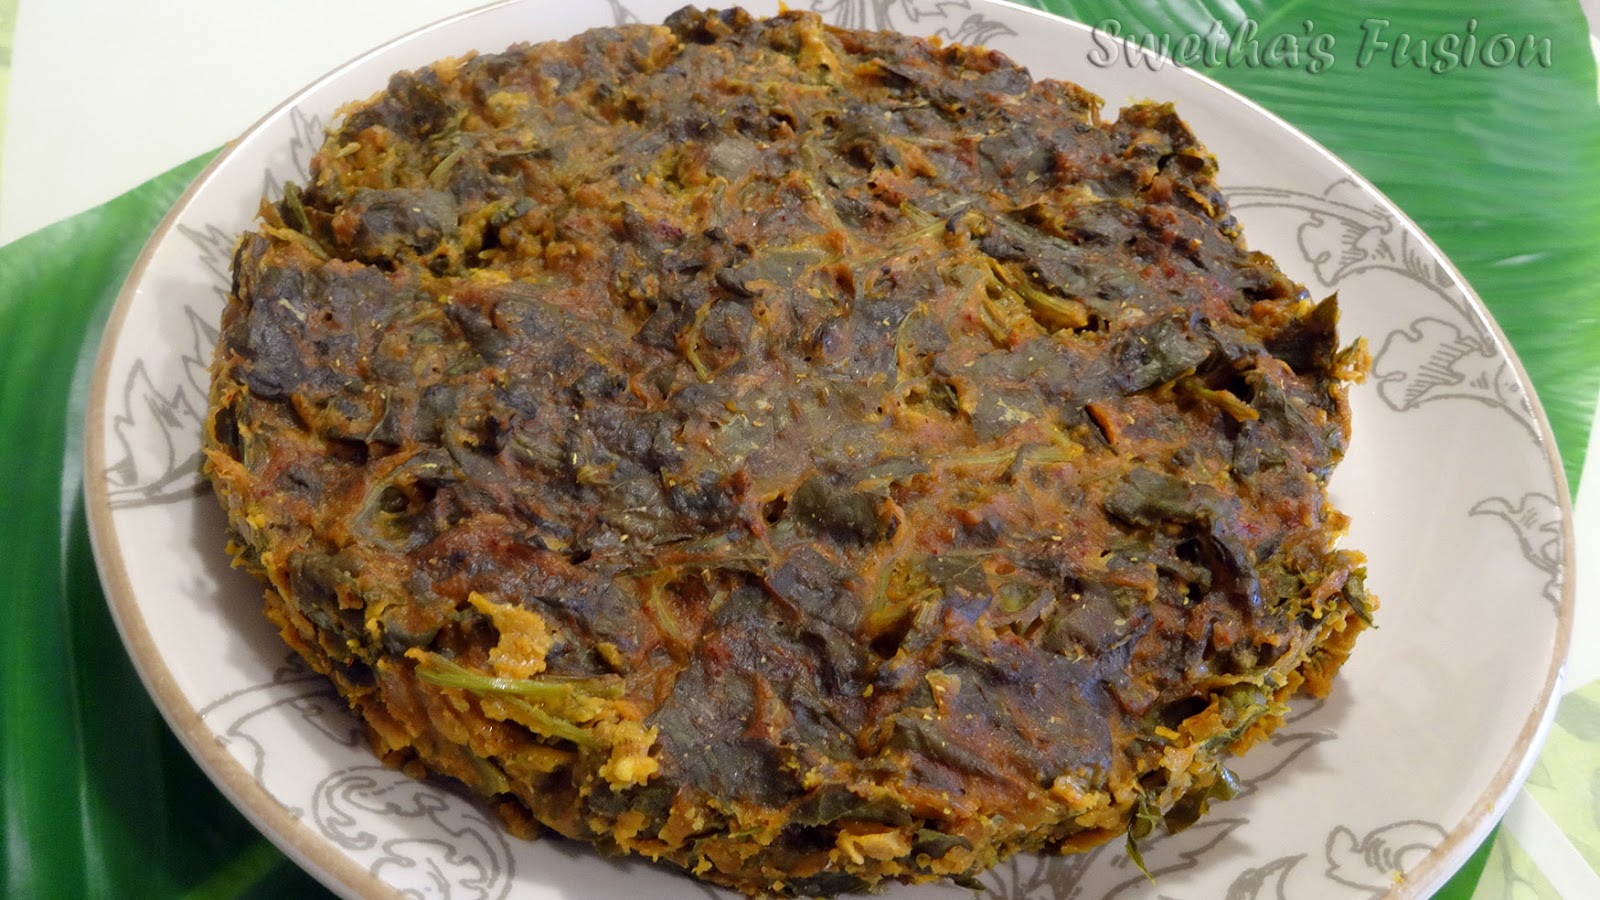
This is a slight twist for the classic Pathrode recipe. Do love Pathrode made out of Colocasia leaves, but since Colocasia leaves are not available here, it is not going to stop me from enjoying Pathrode. This version is made with fresh palak/spinach leaves, besides it is slightly easier to make, ...and don't have to deal with Colocasia leave's irritating itchiness. Taste is almost the same. Hope you will enjoy this version of Pathrode Recipe with your friends and family.
Ingredients:
- 4 cups - Spinach leaves
- 1 cup - Rice
- 2 tbsp - Dhania | Coriander seeds
- 1 tbsp - Jeera | Cumin seeds
- 1 tsp - Methi | Fenugreek seeds
- ½ tsp - Mustard seeds
- 2 tsp - Urad dal | Black gram
- 2 tsp - Channa dal | Split chickpeas
- ½ cup - fresh grated coconut. (optional)
- 10 - Red chilies or depending on how spicy you want use the amount chillies . I use Byadgi red chili which is on the milder side. May choose to combine Kashmiri and Byadgi chili to achieve desired spice.
- 1 tbsp - Tamarind paste
- 1 tsp - Jaggery
- 1 tsp - turmeric pdr
- Salt - as per taste.
- ½ cup - Oil for shallow frying. I use coconut oil, which gives authentic flavor.
Preparing the Masala:
- Soak rice overnight or for at least three hours.
- In a pan, dry roast coriander seeds, cumin seeds, fenugreek seeds, mustard seeds. urad dal, channa dal and red chilies. Transfer it to a blender/food processes
- Optional step: In the same pan, dry roast grated coconut. Add it to the blender along with other roasted ingredients.
- To the blender, add tamarind paste, jaggery, turmeric pdr and salt. Add 2 tbsp of water and grind. If needed, add more water. Grind it into a smooth paste.
- Drain soaked rice, Add it to the blender and grind it into slightly course paste.
- Keep the ground paste aside.
Preparing the Leaves:
- Wash spinach leaves. Cut thick stems.
- Put the leaves in a colander or spread them on a kitchen towel to remove the water. Keep aside
Prepping and cooking the Pathrode:
- Take 1/4 portion or more of the masala and keep aside
- Pour rest of the masala into a large mixing bowl.
- Check for consistence of the masala, if it is too thick add some water. If it is watery add some rice flour.
- Roughly chop the spinach leaves and add the leaves to the masala.
- Mix all together. Cover and keep aside for about 10 minutes.
- Meanwhile add water to bottom of the steam-cooker/idli-cooker/pressure-cooker and put it on stove on medium flame. Bring the water to boil
- Apply oil to the bottom of a metal-pan or cooker-pan. keep aside
- After 10 minutes, you will notice that the spinach has settled well with the masala. If needed, mix-in some more masala which was kept aside.
- Now pour the spinach-masala mixture to the prepared cooker-pan. Thickness should be about 1 to 1½ inches. If needed separate the mixture into two pans.
- Spread and press the mixture evenly.
- Place the pan in the cooker (by now the water should have come to a boil)
- Cover and steam cook on medium flame for about 25 to 30 minutes until done
- If using pressure cooker, don't place the weight (just like cooking idli)
- Once cooked and flame is turned off, let it sit for about 5 to 10 minutes.
- Loosen the Pathrode from the pan using a knife or flat spatula. Transfer the cooked Pathrode onto a plate or a cutting board.
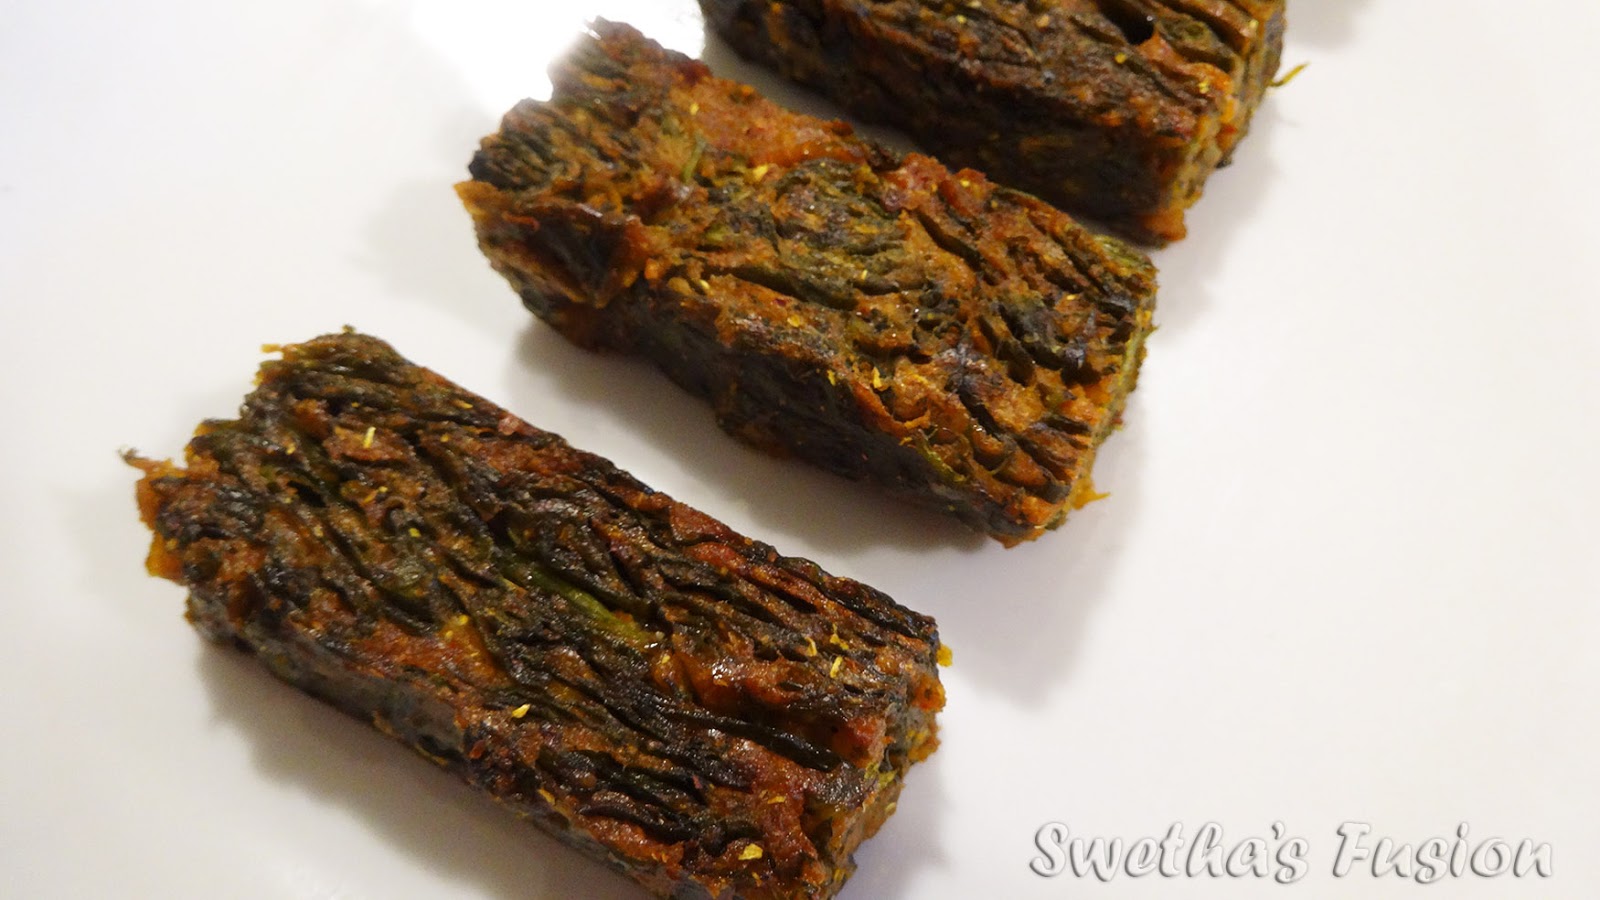
- Cut Pathrode into desired shape (square, rectangle or triangle)
- On a flat tawa, shallow roast on both sides applying little coconut oil. This step is optional but it gives that extra bit of crunchiness on the outer layer.
- Serve hot as a snack or as a side dish.
Enjoy one of the unique and exotic vegetarian dish from South Canara region of India.
Labels: Appetizers, Fritters, Kundapura, Mangalore dish, Side-Dish, South-Indian Dish, Tawa Fry, Vegetarian